Geometric Shapes: Cubes
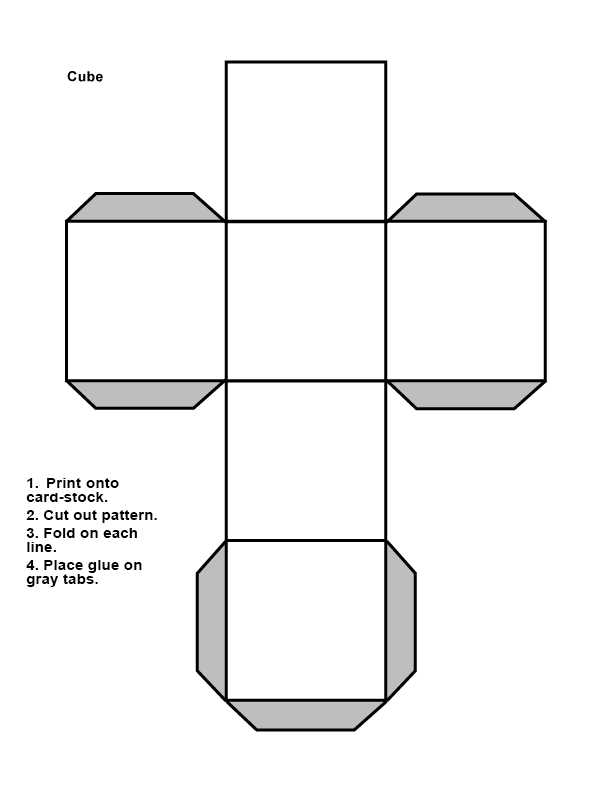
It is recommended that you create your own cube for reference to complete the activities for this week and future weeks. You may print out the following pattern and instructions.
Note: With the cubes that you will be drawing below, notice that the differences of the pitch variation ratio of the top and bottom planes are similar on both cubes, but that the pitch of the left/right variation ratio on the vertical planes are considerably different between both cubes.
Drawing a Cube in 1 Point Perspective Part I
 |
Step 1: Begin by drawing an eye level line on the top 1/3 of your page. Select your vanishing point, which will be on the right 1/4 of the eye level line.Click on the thumbnails to see the drawing steps. |


-
Step 9: Using the same vanishing point, draw a second cube to the left of the first cube by repeating steps 2–8
Drawing a Cube in 1 Point Perspective Part II
 Step 9: Using the same vanishing point, draw a second cube to the left of the first cube by repeating steps 2–8.


2 Point Perspective
In 2 point perspective, the vertical lines are parallel to the format/picture plane with the diagonal lines converging to two vanishing points. Note: For this week and for future assignments where you use vanishing points, place your two vanishing points about 13 inches off the format (page) so that your cube remains in the cone of vision and does not become distorted.
Drawing a Cube in 2 Point Perspective Part I
