Geometric Shapes: Cones
Cone
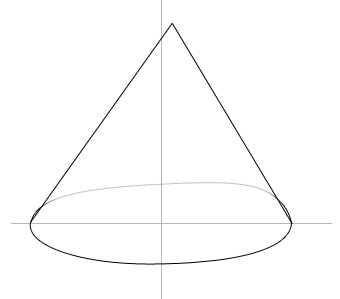
To draw a cone
Step 1: Draw a horizontal line approximately 5 inches in length on the bottom third of the page. This line is the major axis of the ellipse.
Step 2: Divide the major axis in half and extend a perpendicular line up approximately 5 inches above, and 2 inches below, the major axis. This is the center line.
Step 3: Establish the minor axis by marking the center line an inch above and an inch below the major axis.
Step 4: Draw curved ends on the major axis that correspond to the pitch of the ellipse.
Step 5: Draw an arc to and through the marks on the center line, above and below the major axis.
Step 6: Draw diagonal lines to the top point of the center line.
Step 7: Emphasize the sides and bottom half of the ellipse with darker and thicker lines.
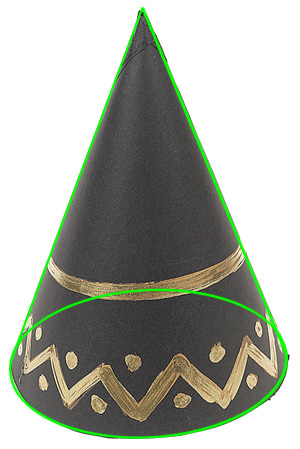
Bad cones
One error people sometimes make when drawing a cone is not having the sides of the cone meet on the center line (an extension of the minor axis) of the cone. Another common error is not making a correct ellipse for the base of the cone.