Art 230 | Typography
Lesson 16
Project
Project 04 Step 02
Web Page Design: Typographic Hierarchy
What are we doing?
You have now tagged your content with Paragraph and Character Styles. In this step, we will create a hierarchical relationship between each typographic element.
Why are we doing it?
To learn how to create typographic hierarchy that assists the reader in acquiring the information—in other words, making the content easy to read. Tagging allows you to target the tagged element with a style; adding the hierarchy makes the content easier to read.
How are we going to do it?
The Web page will be designed as one continuous column. All spacing should be applied with Paragraph and Character Styles.
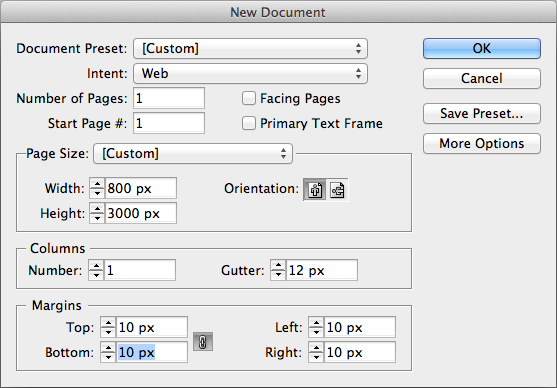
- Create and format a new Adobe InDesign File, matching the specifications to those in the image below.

The dialog box above has the specific requirements to create the new document. | Intent: Web. Number of pages: 1. Start Page #: 1. Width: 800 px. Height: 3000 px. Margins: 10 px on all sides.
- Add a frame at the top that is 150 pixels tall. This will be for the header & navigation.
- Add a frame at the bottom that is 100 pixels tall. This will be for the footer.
- The header and footer will be designed in the next process step. For this step, focus on a system of type with easy-to-read hierarchy.
- Add a text box between the header and the footer. The width of the document is 800 pixels, but you get to choose the column width.
- Save the document as Art230-p4_template-01.
- Copy and paste your tagged content into the new text frame.
Change your body copy size to 16 pt. Use the Paragraph and Character Styles to adjust your other styles to be in proportion to the body copy. Be sure to include the following:
- A Blockquote with a Cite
- One self-created image with a caption
“If you ever find yourself using spacebar-spacebar-spacebar or return-return-return to apply formatting, you are doing it wrong.” —Scott E. Franson
Upon completing the page, find the folder art230_p4 and place your file in it.
Inside the art230_p4 folder is a file named art230p04.idml. Open the file and save.The file you made named Art230-p4_template-01 should show up on pages 4–5 of the document.
If it doesn’t show up:
- Check to make sure the file you made is named Art230-p4_template-01.
- Check to make sure that the file Art230-p4_template-01 is inside the art230_p4 folder.
- Check to make sure the links are updated.
Below are tutorial videos which explain how to complete the assignment:
Project 4 Step 2 Part 1: Page for Web Design from BYU-Idaho Art Dept on Vimeo.
Project 4 Step 2 Part 2: Choosing a Column Width from BYU-Idaho Art Dept on Vimeo.
Project 4 Step 2 Part 3: Linking Web Page Template to Workbook from BYU-Idaho Art Dept on Vimeo.
Project 4 Step 2 Part 4: Hierarchy with Paragraph and Character Styles from BYU-Idaho Art Dept on Vimeo.
Process Blog Post
After you have completed all of the steps listed above for this lesson, you are ready to complete your process blog post. Blogposts should be structured like a presentation with a beginning, middle and end. Each step will involve it's own process and its own unique challenges and successes. Introduce the assignment, talk about what worked for you and what didn't, explain which of your solutions are working using design principles to back it up. If you have specific questions about how to move forward, you can ask them in the blogpost.
Please include the following in your blog post:
- Write a 200-word blog post that includes a JPEG image exported from Adobe InDesign.
- Copy the text from the blog post and paste it into Project 04 workbook.
- Include paragraph breaks, subheads or other typographic elements to make the post visually accessible.
- The post should be designed and encourage a reader to engage.
- Include a featured image
Once the Process Blog Post is complete, submit a link to the post in I-Learn. To submit the link in I-Learn, click P4S1 link in the left navigation and then click on the Open button at the bottom of the I-Learn window.
After you have submitted your assignment in I-Learn, you will need to provide feedback to your team members in WordPress. Your feedback to team members will be on the following areas:
- Idea: Rate the uniqueness of the overall idea. Is it ordinary and expected or original and unexpected?
- 1–3 pts: unimaginative – confusing
- 4–6 pts: ok – great
- 7–10 pts: great – amazing
- Formal design choices: Rate how well the design principles are used.
- 1–3 pts: unimaginative – confusing
- 4–6 pts: ok – great
- 7–10 pts: great – amazing
- Typography: Rate font choice, size, kerning and spacing, add to the communication of the concept.
- 1–3 pts: not at all
- 4–6 pts: doesn’t help or hurt
- 7–10 pts: significantly adds to the overall communication
- Portfolio: Would you put this in your portfolio? Base this on the quality of the work, not whether it would be appropriate for your personal portfolio.
- 1–3 pts: no
- 4–6 pts: maybe with changes
- 7–10 pts: yes with no changes – absolutely
- Blog Post: Rate the quality of blog post.
- 1–3 pts: messy, unclear, major errors
- 4–6 pts: understandable, organized, rambling, spelling or grammar errors
- 7–10 pts: clear, thoughtful, engaging, free from errors
You should list the item, your rating, and any comments you had to help your team member improve. Your feedback on process blog posts will not be used as part of their grade but will help you to teach one another to improve their work.
Exercise
Type Journal | Part 4
What are we doing?
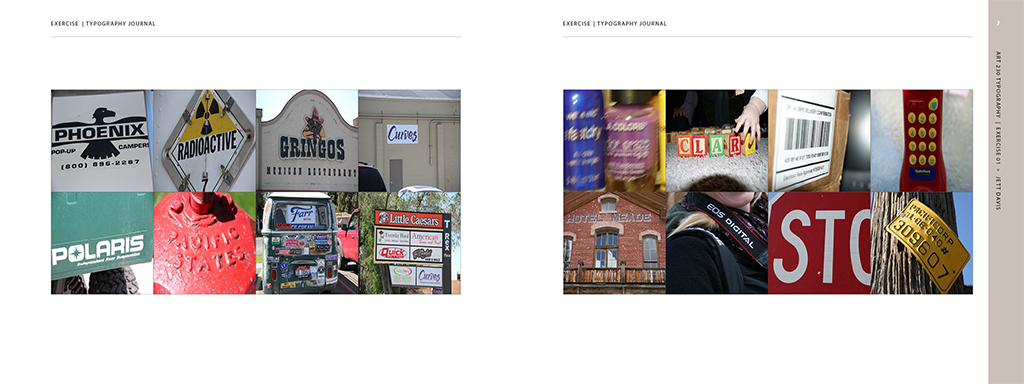
Complete 2 more spreads in your type journal.
(You should have 8 pages in total after completing this exercise.)

What we are going to do?
Using a camera, capture examples of typography in the world around you.
Why are we doing it?
Typography is about learning to see. Capturing glimpses of typography provides an opportunity for slowing down and seeing the typographic messages all around us.
How are we going to do it?
Use a camera to capture your typographic imagery. Do not use the Internet. Crop the images to fit into the squares in the Type Journal Exercise workbook. This project needs to be completed with 8 pages and a blog post this week.
Submit the URL for the Exercise Blog Post in I-Learn by clicking on the "Open" button below and pasting your blog page URL in the space provided. Then, click submit.
Reading
Reading 07
- Text | Thinking with Type by Ellen Lupton (2nd edition)
- Pages | 124–147