Art 235 | Graphic Design
Lesson 01
Project 01 | Visual Alphabet
Step 01 | Observation and Creation
What are we doing?
We are designing an alphabet made by photographing objects in the world around you. In this lesson, we will complete 20 initial concepts and 3 proofs of concept ideas.
Visual Alphabet Objectives
- See typographic opportunities all around us.
- Think about typography beyond choosing a font on the computer.
- Visual Alphabet: Overview
Why are we doing it?
Design isn’t always about creating something new. In fact, most times it is taking something we are familiar with and showing it in a new light. Creating this alphabet will challenge your observational, creative, and technical skills.
How are we doing it?
Complete Project Step | Visual Alphabet: Observation and Creation by:
- Completing all workbook pages
- Completing the Process Blog Post
- Submitting the link in I-Learn
Concept Development
Examine and explore the world around us to find objects that inherently are or, with a small adjustment, can become letters.
- Find and document through photography and/or sketching 20 different letters. (Letters may be repeated in this part of the process)
- Find letters, don’t make letters. Creating a letter “C” by taking a bite out of a cookie is more interesting than placing a lot of cookies in the shape of a letter “C.”
- Design a workbook page documenting the 20 different letter ideas.
Proof of Concept
Choose three of the ideas and produce 5 different letters to demonstrate that the idea can be used to create a complete alphabet.
- Photograph the five different letters for each idea. Use Photoshop to remove the background from around your new letters. (Photographing on white is a good idea because it makes masking easier.)
- Write a caption for each idea.
- Design a workbook page for each idea set.
Workbook
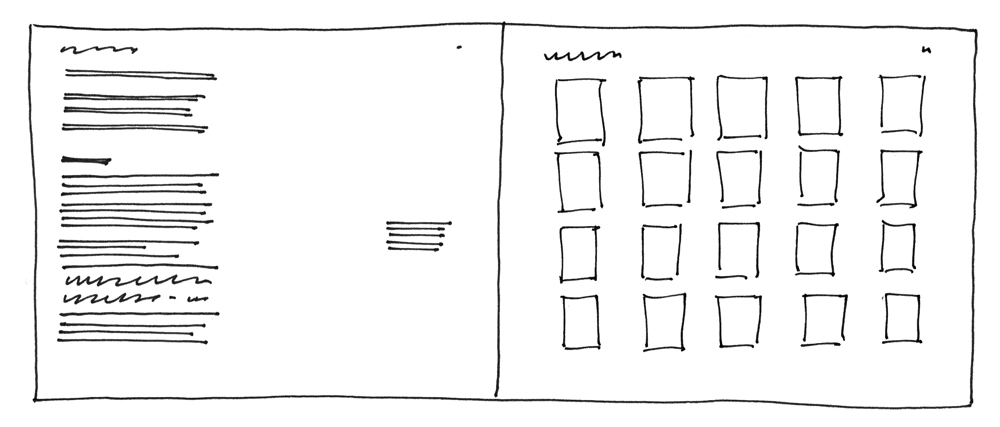
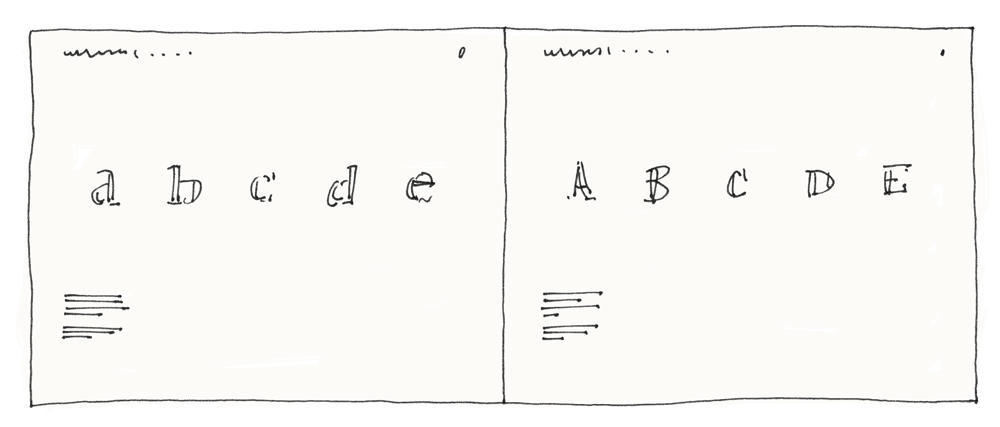
Part of each project requires you to create your own workbook. The workbook documents your process in completing this project. Completed workbook pages can be exported as JPEG images to use in your blog post. The workbook will be due upon completing the entire project; however, it is recommended that you complete the pages as you progress through the project.
The workbook should be organized and designed. The sketches are to be used as a minimum guideline. If you need additional pages, please feel free to add them.
Include the following pages:

Project Step Title, Introduction, Blog Question, Blockquote, and Conclusion. | Concept development: 20 concept sketches (photography or sketches) and concept caption

Proof of concept: Idea 1 | Proof of concept: Idea 2

Proof of concept: Idea 3
Process Blog Post
After you have completed all of the steps listed above for this lesson, you are ready to complete your process blog post. The blog posts provide an opportunity to share your work with the other students taking the course this semester. It is important to note that each blog post is Pass/Fail. In order to pass, the post for each step must be complete in every way. It must contain a minimum of 200 words and all process steps must be complete. Completing 19 sketches of 20 assigned is incomplete and will receive a failing grade.
Please include the following in your blog post:
- Write a 200-word blog post that includes the JPEG image exported from Adobe InDesign. Answer this question in your post: How did completing this project step change the way you looked at everyday objects?
- Copy the text from the blog post and paste it into Project 01 workbook.
- Post Title | P1:S1 Concepts
- Categories | Team #, P1:S1 Concepts
- A one- or two-sentence introduction statement describing project step.
- An image of Concept development sketches (20 minimum), with a caption
- An image of Proof of Concept for Idea 1, with a caption
- An image of Proof of Concept for Idea 2, with a caption
- An image of Proof of Concept for Idea 3, with a caption
- A concluding sentence
The blog posts should be designed to encourage a reader to engage. Include paragraph breaks, subheads or other typographic elements to make the post visually accessible. Once the Process Blog Post is complete, submit a link to the post in I-Learn. To submit the link in I-Learn, click the P1S1 link in the left navigation and then click the Open button at the bottom of the I-Learn window.
After you have submitted your assignment in I-Learn, you will need to provide feedback to your team members in WordPress. Your feedback to team members will be on the following areas:
- Idea: Rate the uniqueness of the overall idea. Is it ordinary and expected or original and unexpected?
- 1–3 pts: unimaginative – confusing
- 4–6 pts: ok – great
- 7–10 pts: great – amazing
- Formal design choices: Rate how well the design principles are used.
- 1–3 pts: unimaginative – confusing
- 4–6 pts: ok – great
- 7–10 pts: great – amazing
- Portfolio: Would you put this in your portfolio? Base this on the quality of the work, not whether it would be appropriate for your personal portfolio.
- 1–3 pts: no
- 4–6 pts: maybe with changes
- 7–10 pts: yes with no changes – absolutely
- Typography: Rate how font choice, size, kerning and spacing add to the communication of the concept.
- 1–3 pts: not at all
- 4–6 pts: doesn’t help or hurt
- 7–10 pts: significantly adds to the overall communication
- Blog Post: Rate the quality of blog post.
- 1–3 pts: messy, unclear, major errors
- 4–6 pts: understandable, organized, rambling, spelling or grammar errors
- 7–10 pts: clear, thoughtful, engaging, free from errors
You should list the item, your rating, and any comments you have to help your team member improve. Your feedback on process blog posts will not be used as part of their grade but will help you to teach one another to improve their work. I will be checking your comments on your team members’ work. Comments should be between 100–200 words and should be directly related to the content of the team member’s post.
Deadlines