ECEN 150 Laboratory Experiment:
Inductors Purpose: 1. Demonstrate how inductors are constructed. 2. Demonstrate how an inductor's physical characteristics affect its inductance. 3. Become more proficient with using basic laboratory instruments.
Required Materials: small-diameter coil form (plastic drinking straw, empty ink pen shaft, etc.)
approximately 2 meters (6 feet) of
magnet wire approximately 5 centimeters (2 inches) of tape
Required Equipment: inductance meter with clip leads -- OR -- DMM with leads, function generator with leads, proto-typing board, and a 470 µF capacitor ruler, or other length-measuring tool calibrated in metric units wire cutter/stripper
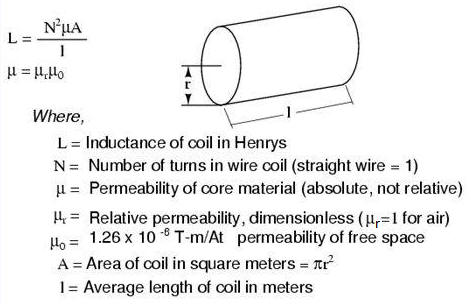
Background: An inductor is a wire that is coiled to increase the effects of the induced magnetic field. The permeability of space (or air) is 1.26 x 10 -6. Anything you put in the core or around the coil will modify this value, and is called the relative permeability. For this lab, the core is simply air.
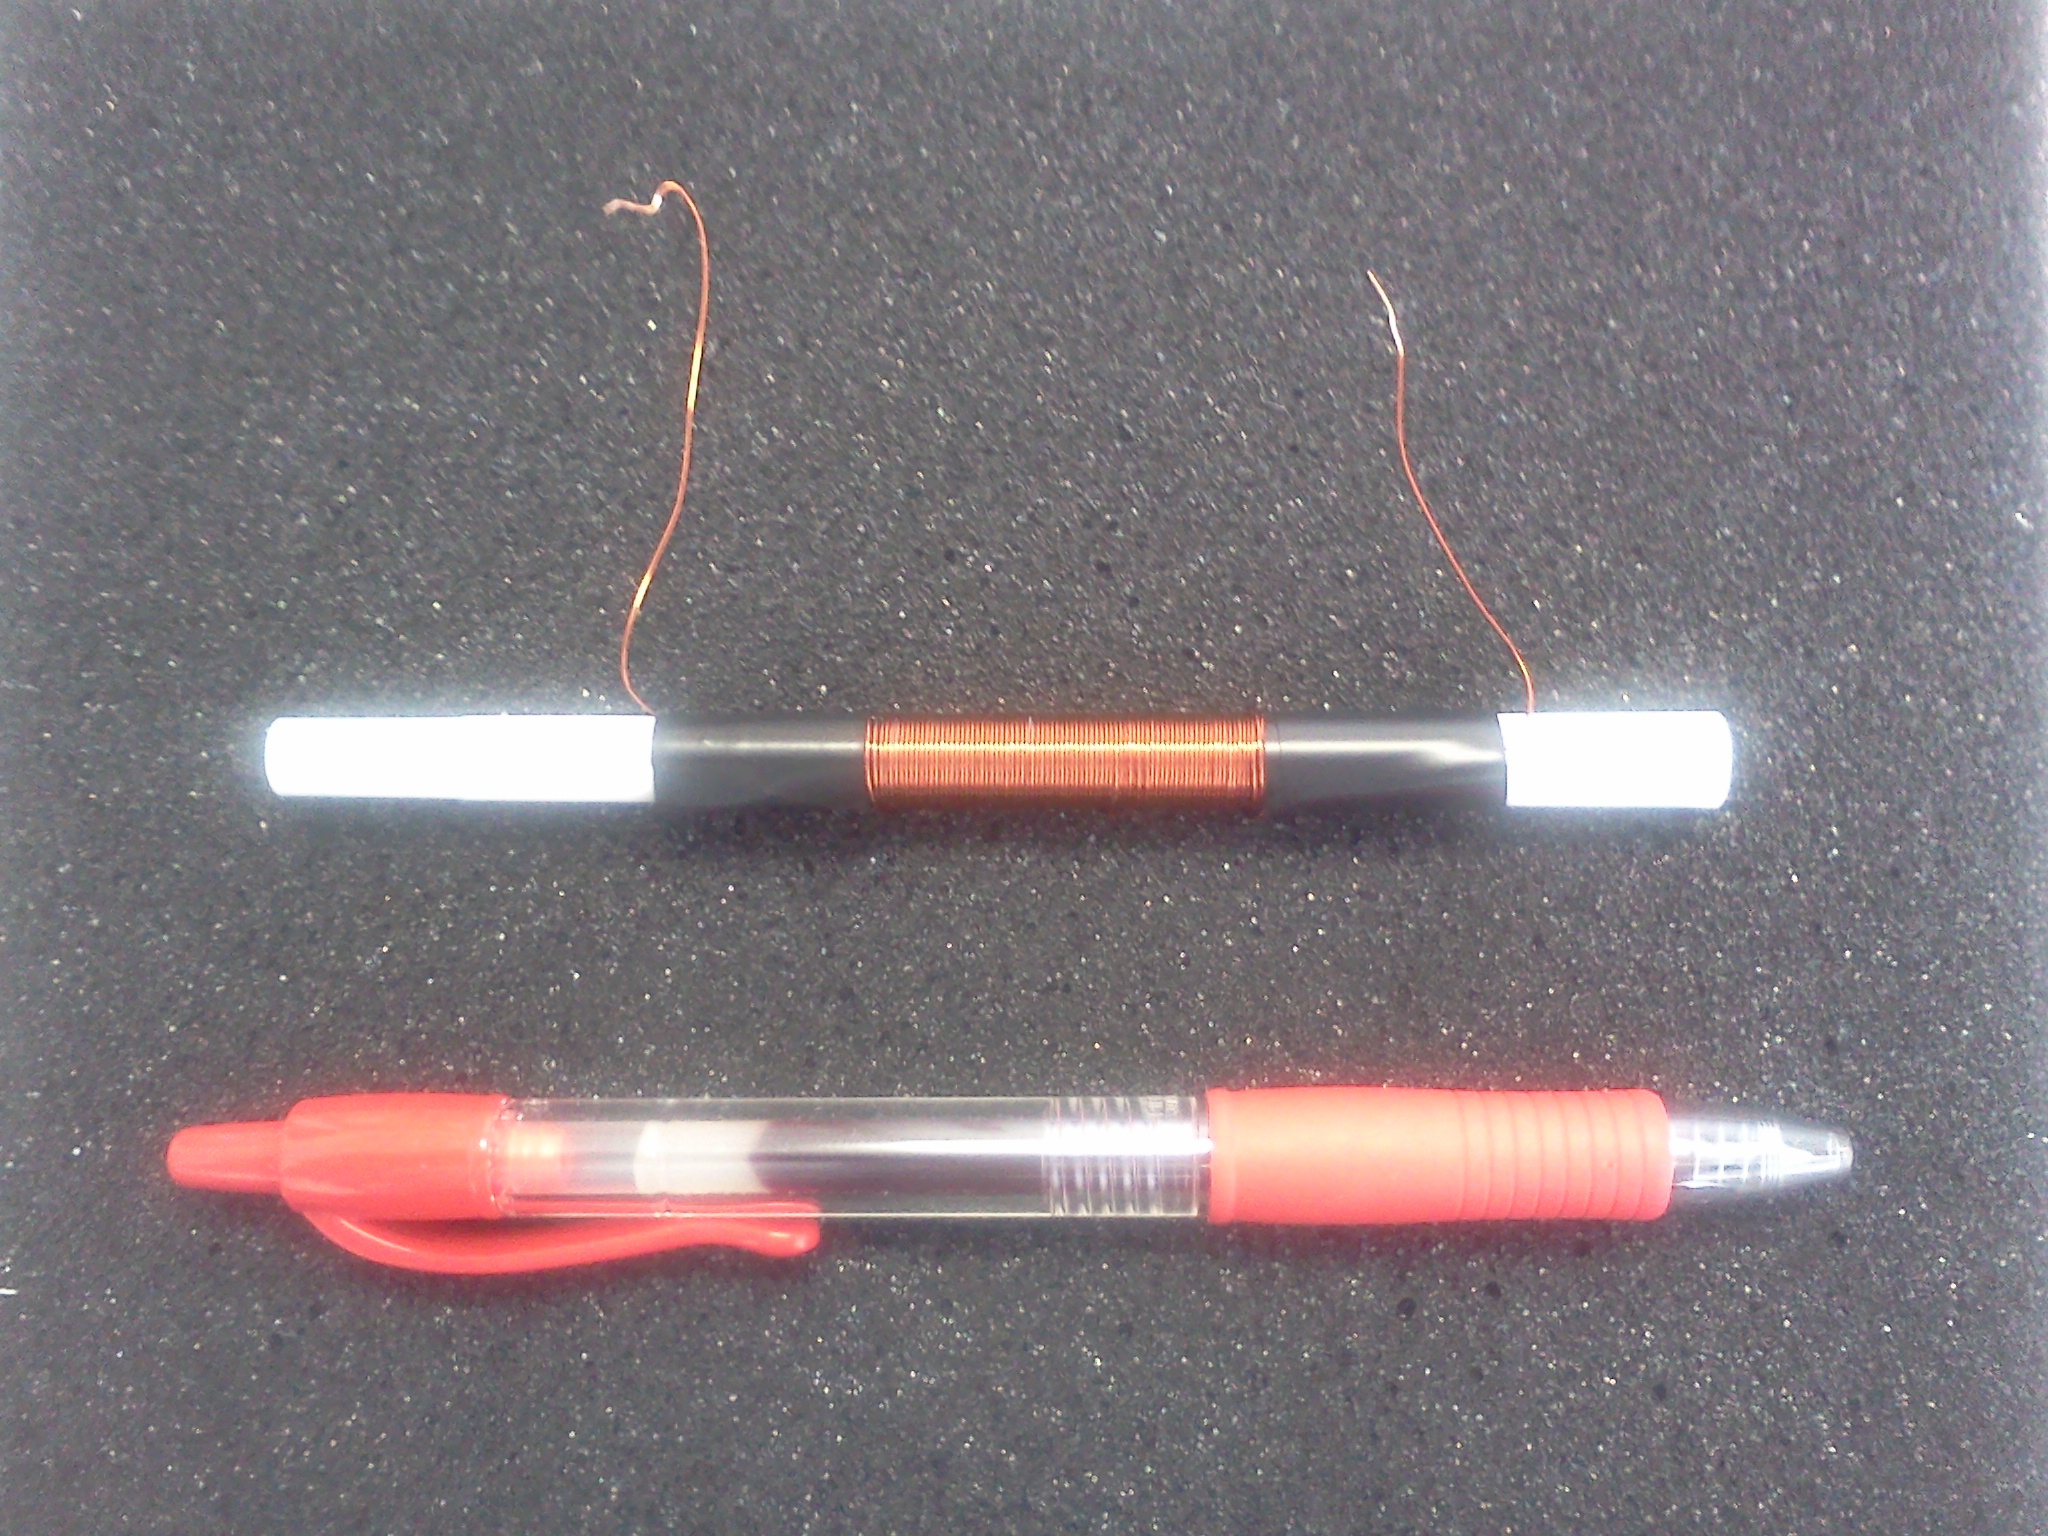
1. Count and record the number of turns as you wind your magnet wire neatly around the coil form so that it has a consistent diameter along its entire length. (See the pictures below.) When looking at the coil from the side, you should not see a bulge in the center or on the ends. 2. Measure and record the actual length of the inductor in meters (see the diagram above). 3. Measure and record the actual inside diameter of the inductor in meters. Divide the diameter by two to get the radius and record it as well. (r = d/2) 4. After making these measurements, secure the coil in place with tape. Cover as little wire as possible -- the inductance will be affected! (Figure 1 shows the magnet wire wrapped on a plastic tube and secured with tape.)
Figure 1: Hand-Made Inductor (shown with a pen for scale) 5. Strip the enamel off the two ends of the wire to allow good electrical contact. This very important! 6. Calculate and record the area in square meters of the inductor. (A = πr2) 7. Calculate and record the inductance of your inductor. Assume an air core; the relative permeability of the plastic coil form is negligible. If you used about 2 meters of magnet wire and wrapped it around a hollow ink pen, as shown in Figure 1, your inductor will be about 5 µH to 15 µH. 8. If you have an inductance meter, measure and record the actual inductance of your inductor. Instructions for the Tektronix Type 130 L-C meter in the Austin Building: (8a) Turn the Range Selector to the 30 µH scale. This selects the center black scale on the meter where each tick mark is 1 µH.
(8b) Short the
meter's alligator clips together and adjust the Coarse Zero or Fine
Zero knobs until the meter needle is exactly on zero.
You will have to do this again if you change scales.
Discussion & Conclusions: What conclusions can you make? Start with these: How could you easily convert your inductor into a variable inductor? How would the inductance have been affected if you had wrapped the same wire around a large-diameter pill bottle instead of around a small-diameter empty pen casing or straw? (You may have to do some arithmetic to answer this one.)
Notes: You may copy this detailed procedure into your laboratory report -- this time. Put N/A (not applicable) in the Schematic Diagrams section of your lab report.
|
||


